6 Wood Finishing Myths You Should Stop Believing

Wood Finishing Products

Time and material cost spent in a woodworking project have the ability to turn the final finishing stage into a stressed situation. There are range of ideas you can click when concerned about finishing. Take a look at the usual wood finishing myths along with the actual concepts. Do read it, as you may come across some really useful details about wood finishing products.

  1. Myth:Finishing on both sides of wood prevents or decreases warping.
    Fact: Finishing only slows but doesn’t reduce or prevent warping that results from wood shrinking. This is because moisture vapor goes through the finish and leads to warping up to an extent. Warping that’s caused by compression shrinkage on areas open to wetting & drying are not hindered.
  1. Myth: For better results, sand to #440 or finer grit.
    Fact: Wood sanded to #440-grit has high gloss as compared to wood sanded to #180-grit, as #440-grit polishes more than #180-grit. However, no major difference is seen after application of any film finish. How about trying it and seeing how many hours you save.
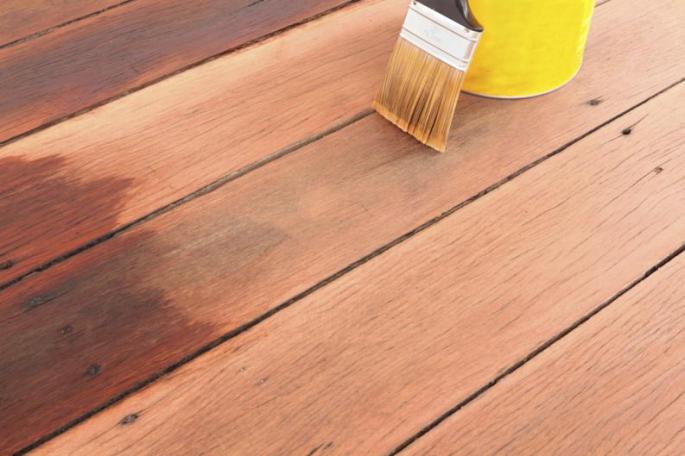
  1. Myth:Slow brushing leads to best results.
    Fact: Slow performance isn’t appreciated anywhere. Hence, brushing needs to be done rapidly. Make sure maintaining the control.
  1. Myth:Brush should be applied across the grain first and then with the grain.
    Fact: You can opt for slow-curing finishes, like varnishes. Though you may get a coat that’s little more even in thickness but it won’t be visible.
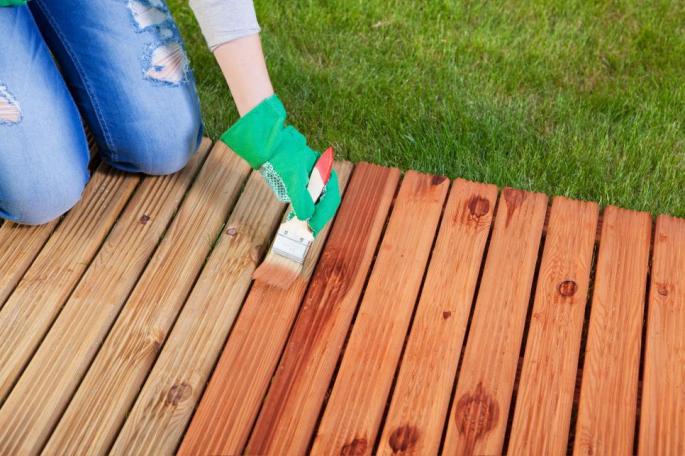
  1. Myth:The longer deck stain colors are left on the wood, the deeper they soak in the wood and the darker the wood turns.
    Fact: Yes, wood turns darker when stain is left for longer but the reason is different. Actually, some of the thinner in the stain evaporates, which increases the ratio of colorant to liquid. With high concentrations of colorant, darker colors are produced.
  1. Myth:Apply and wipe off stain with the grain.
    Fact: When excess stain is wiped off, direction of stain application doesn’t matter. Also, it doesn’t matter in which direction stain is wiped off. What matters is making final pass with the grain, to ensure that streaks left are not noticeable.

Stop following anything you just hear from someone. Trust the proven results that have been explained to you quite clearly. Good luck!


Wood Finishing Products

The Role Of Temperature In Staining Outdoor Wood With Perfection

Wood Finishing Products

Nobody could ever deny the importance of staining his outdoor wood assets. From decks and patios to benches and railings everything should be treated with superior quality of wood finishing products. It is essential not only for defending them from decay but also they appear as beautiful as new after this.

When homeowners are keen to add to the curb appeal of their property they can select the best from variety of deck stain colors and apply them on the lumber. For staining you can hire professionals or you may keep the job with you if you have got the right tools, enough patience and time and most importantly knowledge of temperature.

Did you read it right? Was it knowledge of temperature? Yes it is all about temperature at the time when you took up the task of staining your external wood. For beginners it can be perfect to plan it on a weekend. After you get up late in the morning, naturally because it is a holiday, you spend some leisure time with your spouse and kids in preparing luxury breakfast. Post breakfast it may again take half an hour to one hour in collecting the things that will assist you in cleaning and staining your deck. Stop if it is already 1 or 2 in the clock. Many of you may ask why?

Well it is important to look for an ideal temperature so as to get the best staining results. For many homeowners it may come as a surprise that they should make use of deck sealer and stain after looking the weather forecast.

Noteworthy Points That Relate Temperature and Staining

  1. High temperature may not be conducive for staining schedule as stain may dry too quickly. This will not allow penetration of stain deep into wood and therefore it is important to choose a day when temperature is either less than 90 degrees Fahrenheit or stain early in the morning.
  2. A cloudy day is much better choice than a sunny day to stain your outdoor wood, but if rains are predictable refrain yourself from staining. Moisture and rain will not let the stain dry and it might get washed away with a pour.


Wood Finish

Summer Special Tips For Staining Outdoor Wood

Wood Finish

For deck owners summertime is deck time. Modern American homeowners understand the significance of their decks and patios. They are not mere extensions of your living space but they are perfect spots for all family gatherings and BBQs. This is possibly why they buy best of stain colors to beautify the wood decks and keep them in best state.

External wood especially that forms your deck is exposed to lot much of physical abuse. It is undoubtedly the highest traffic area of your house and is not spared from the Sun, wind, snow and much more on any given day.

What Comes Before Beautification of Deck?

Summer season is not difficult for human but for your wood too. While your expectations from your lumber patio and decks are high, they in turn need to be properly maintained and prepared for summer gatherings with the help of best quality of deck stain and sealer. You can do a lot like adding hanging pots to your deck for giving it a cool look. Some home owners prefer to shade it up with big and beautiful umbrellas while others bring some artificial fountains to give it special effects. From seating arrangements to lighting you can make it favorite spot for all because it is suitable to host friends’ reunion or family get together. But in absence of below mentioned small but very important steps it can all prove to be a failure.

Look out for dangerous signs. Your wood is subject to rotting and cupping. These when avoided can bring up the cases of injuries and tripping. Get them mended before you get into cleaning and staining your wood surface.

Ask questions to professionals. They know the best what kind of wood finishing products will suit the local climate. In many areas oil based premium wood deck finish will serve for two years or so.

Get engaged in cleaning. Don’t let the BBQ stains settle on wood surface. Clean the spills immediately as grease is not good for the finish. Make sure you don’t leave the debris over a week.

To help it look young and strong season after season you should do a lot when it comes to care and maintenance of timber deck.

Deck Stain and Sealer

Choose The Right Brush For Wood Finishing

Deck Stain and Sealer

Are you planning to buy wood finishes to improve the life and enhance the beauty of your wooden furniture or deck? If yes, apart from buying the best finish, you need to be careful about few things. What are they? Read further to know it and so much more.

There’s no denying that finishing products are possible to be applied with brushes, clean rags and various other applicators. However, for best results and clear look, use the right brush is the best deal. Want to know what is special about a brush? Check out the below given reasons:

  • High-quality brush is able to carry more wood finish
  • It gives neat work with negligible runs and dips
  • It does not leave bristles in the finish
  • It responds very well to cleaning and storage
  • It can be reused
  • It lasts longer

So, any brush can do all these? Well, the answer is no. You have to be very careful in choosing the right brush. Want to know how to do that? Take a look at the below given characteristics:

  • It gives a well-balanced feel
  • It has flexible, silky and long bristles of varying lengths
  • It has bristles with flagged or split tips
  • It is made with a non-corrosive metal or plastic ferrule
  • It has tapered and well-secured bristles

By now its clear that you need to be careful regarding the quality of the brush when it comes to get neat and appealing finish. However, you must keep in mind what kind of project you are going to undertake. For example, whether you are working with oil-based finish or water-based.

If working with water-based stains and finishes, use brush with synthetic bristles for water-based stains and finishes. As far as oil-based products are concerned, use good quality natural bristle brush.

With this, it’s a wrap. Get up now and buy the proven and environment friendly wood finishing products. And yes, keep these points in mind for the best brush.

Smart Homeowners Hire Deck Staining PRO

Deck StainsA well-stained deck is a necessity of every modern American home. Deck staining is since not only about buying premium wood finishing products and using them. You need to use them in the right way and moreover the deck staining project requires a lot of time and energy. These two might not be available to you in abundance is you are like most of the homeowners-working and busy.

Why to stain your deck on time?

If you are a true American, you cannot say no to enjoy the wonderful outdoors no matter it is spring or falls. Overlooking the fact that your wood deck gets exploited by Mother Nature’s agents can cause irreparable harms to your patio or deck. Even the greatest deck sealer will do no good to protect your outdoor timber after certain period of time.

Eventually with the lots of foot traffic and surviving through all the odds of changing weather your wood needs to be restored. Overlooking the fact can prove to be very expensive to you. From heavy deck repairs to renovation costs it can take the lazy and careless homeowners anywhere.

What to prefer between DIY deck staining and hiring pros?

While almost every American family enjoys to host summer evening parties in their houses, decks and patios take the center everywhere.  They like to sit back to enjoy drinks and relax in their leisure time. For this they need to be very particular about deck care and maintenance.

Question arises at this very point is whether to hire an expert for doing the job and giving away his valuable suggestions on which wood finish oil to buy or save money and do it yourself. Many would understand the possible damages of carrying out the staining activity on their own from this post and rest will learn from their own mistakes.

Having the ample patience and time for staining deck and fences is not a layman’s cup of coffee. Moreover he lacks the eye for details and hands-on experience. Neither you have the tools nor the knowledge of the right staining practices.

Those who claim to be internet educated get their eyes wide opened while looking at the practicality of the staining project.

wood finish

Easy Guide on Wood Oil Application Technique

wood finish

When it comes to choose the best wood finishing oil, it is high-quality and natural. Most of these oils can be easily used on almost every type of wood finishing projects including decks, furniture, interior surfaces, tables, cabinets, panels, wood floors and various other porous surfaces.

If you are in search of superior quality oil that gives clear finish, try going for tung oil base which has got no cheap filler oils and added driers. It is important to understand what does a good oil refers to. Well it refers to durable, deep penetrating, water resistant and durable oil that lasts for years and gives the expected results.

Once you have purchased the needed wood finish oil, it is important to know the right application technique. This is because if not applied the right way, it will not give the desired results and you may come across various problems from time to time.

How to apply oil the right way?

Well, now that’s a smart question and its answer is explained clearly in the below mentioned points. Check it out below:

  1. Apply the oil liberally with a cotton cloth that’s lint free. You can also use a brush for a smooth application.
  2. Now allow the oil to penetrate evenly for 15 minutes. Make sure to remove excess oil with the clean cotton cloth.
  3. Never allow the oil to dry before you have removed the excess finishing oil. Generally, 3 coasts of oil are recommended at an interval of 24 hours between each coat.
  4. Remember that additional coats increase the surface protection as well as sheen.
  5. For best results and for a silky smooth surface, rub the surface gently between each oil application.
  6. To enhance the wood, you can apply a coat of traditional paste wax or all-natural beeswax after the final coat is done. This will add depth and extra surface protection.

With these easy techniques, you can apply wood finish oil the best way. What else? The results will definitely meet your expectations.

How to maintain wood finishing oil?

That’s another important yet simple thing to do. Want to know how? Here they are in the below given points:

  1. Dust with a soft and dry cloth. Slightly damping the cloth is also a good way.
  2. Apply a fresh coat of oil when needed.

With these simple things in mind, you can get a standard finish that will shine for years.

Bring Colorless Wooden Surfaces To Life With The Right Stain Colors

40e0ffeccc1b4d3041921f98375a5a31.jpg

Staining wood is not just a job to make the wooden stuff look appealing but also a colorful and fun experience. Choosing the right colors and working like a pro does not need any special trait, as it is all about playing with the right textures. Opacity and stain palettes are best to try when one is beginning their coloring journey.

When staining, it is very important to determine the appropriate opacity, as it ranges from lightly pigmented to complete coverage. Besides protecting the deck and wooden surface, they also enhance the overall look. ‘Mix and match’ is the best strategy for a smooth and pleasing curb appeal. One can explore the infinite world of wood stain colors and let their natural wood shine throughout. Simply cover the wood blemishes with the right grain colors and restore the new and attractive look forever.

How to stain a deck
slide2.jpgWhen it comes to stain a deck, knowing the right technique plays a crucial role. If you are planning
to stain your deck, check out the helpful guidelines below:

  1. Don’t powerwash: Powerwashing needs a very sharp eye and practice as well. This is because this technique when done improperly, results in gaps, splintering and warping.
  2. Proper cleanliness: The surface should be cleaned thoroughly using a long arm brush and deck cleaner.
  3. Let it dry: Dry the surface for at least two days to ensure moisture does not gets trapped while staining.
  4. Begin with staining between the slats: For this, 2 edging pads with properly trimmed plastic edges are needed. Besides this, a paint tray and an extension pole are the other needed essentials. Place the edging pads opposite from each other and dip them in stain. Remember swiping in between slats. Now, use a roller and roll over the surface to prevent the paint drips from drying on the surface.
  5. Stain the nails: Doing this is easy and less time consuming when staining the slats with the help of side of the roller.
  6. Get the smooth finish: For the expected results, it is good to roll with an extension handle.

These simple steps will help you with the desired results besides improving the life of your deck.